Android Widget Tutorial: Creating a screen-lock Widget in a few steps
October 6th, 2011 by Micha Kops In today’s Android tutorial we’re going to take a look at Android’s Widget API and how to make a widget interact with a service using intents.
We’re going to create a fully functional application that allows us to enable or disable our smartphone’s screen lock settings using a widget that can be placed on our home screen.
Finally I am going to show how to use a smartphone to test and debug our application and connect it to the IDE.
Contents
- Prerequisites
- The plan - what we're going to implement
- Create a project
- Creating the Widget Layout
- Externalizing Resources
- Dimensions and unit of measure
- Creating the AppWidgetProvider
- Creating and Registering the Service
- Adjusting the Permissions
- The final AndroidManifest.xml
- Running the Application
- Running/Debugging on your Smartphone
- Tutorial Sources
- Troubleshooting
- Resources
Prerequisites
The following software should be installed if you want to create the widget application by yourself.
I am going to use Eclipse throughout the tutorial but you’re not forced to use Eclipse – I recommend it though :)
- Java Development Kit 6
- Android SDK
- An AVM with at least Android 2.2 / API Version 8
- I recommend using Eclipse with the ADT Plugin installed but it’s optional
The plan – what we’re going to implement
We’re going to implement a widget that is able to execute the following actions:
- If the user clicks on the text “On” in the widget, the screen timeout will be set to a pre-defined value and the widget will update its display to show this information
- If the user clicks on the text “Off” in the widget, the screen timeout will be disabled and the display updated
- The display should load and display the current setting for the screen timeout especially when it is loaded for the first time, the widget is updated or the user clicks somewhere in the widget (exception: “On/Off”)
To achieve this goal, we’re going to need the following components:
- A WidgetProvider to handle updates and events that our widget receives and triggers
- Several Intents and PendingIntents to handle the situations when the users clicks on “On”, “Off” or somewhere in the widget
- A Service to respond to the events and to adjust the configuration to enable or disable the screen timeout
Create a project
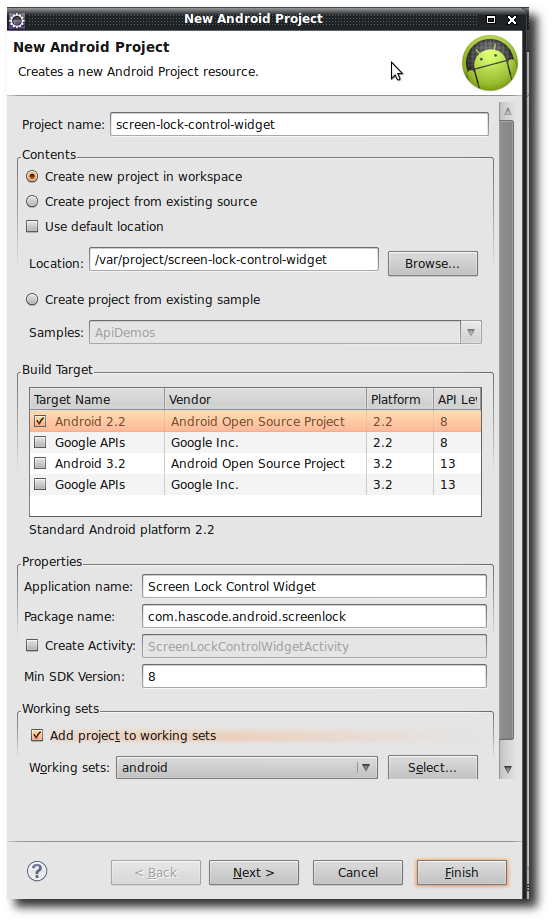
First we need a new Android project …
- Create a new project by doing New Project > News Android Project in Eclipse
Creating the Widget Layout
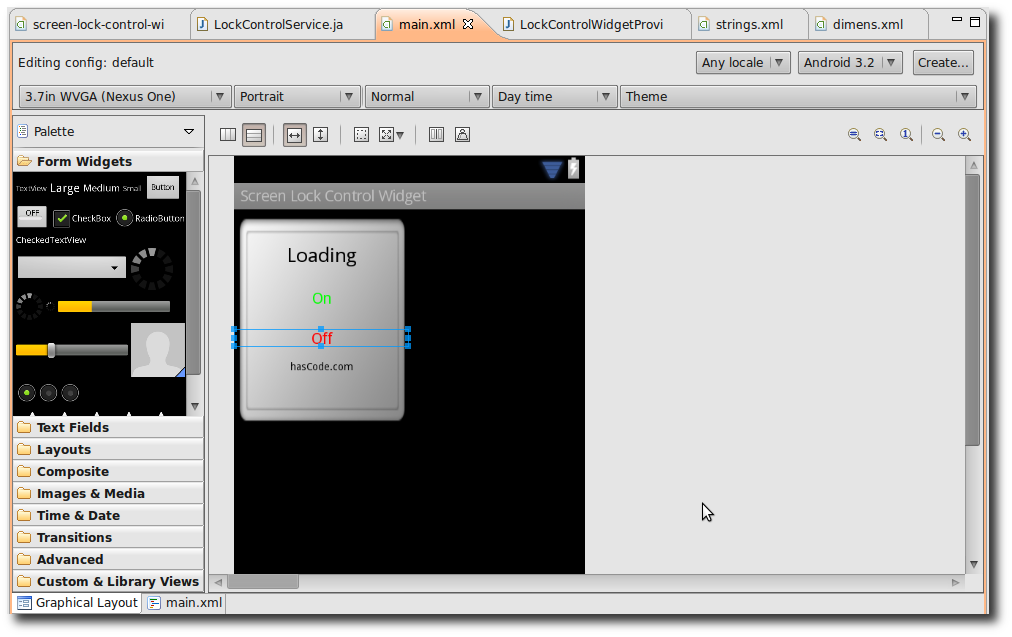
We’re going to create a very basic widget so we’re using a LinearLayout that has four TextViews (“State”,”On”,”Off”,”someadvertisementforthiswebsite”)…
- Open your res/layout/main.xml and use the Graphical Layout tab to adjust the layout
- That’s the final content of my main.xml – I am going to explain the referenced values used there in the next chapter
<?xml version="1.0" encoding="utf-8"?>
<LinearLayout xmlns:android="http://schemas.android.com/apk/res/android"
 android:id="@+id/widget_root" android:layout_height="200dp"
 android:layout_width="160dp" android:background="@drawable/background_2x2"
 android:orientation="vertical">
 <TextView android:id="@+id/tvTime" android:layout_width="match_parent"
 android:gravity="top|center_horizontal" android:paddingTop="30dp"
 android:textColor="@android:color/black" android:text="Loading"
 android:textSize="18sp" android:layout_height="wrap_content" />
 <TextView android:text="@string/on" android:id="@+id/txtOn"
 android:textColor="@color/green" android:gravity="center_horizontal"
 android:layout_width="fill_parent" android:textSize="14sp"
 android:layout_height="wrap_content" android:layout_marginTop="@dimen/states_margin_top" />
 <TextView android:text="@string/off" android:id="@+id/txtOff"
 android:textColor="@color/red" android:gravity="center_horizontal"
 android:layout_width="fill_parent" android:textSize="14sp"
 android:layout_height="wrap_content" android:layout_marginTop="@dimen/states_margin_top" />
 <TextView android:layout_width="fill_parent" android:id="@+id/txtVendor"
 android:textSize="9sp"
 android:gravity="center_horizontal" android:textColor="@android:color/black"
 android:layout_height="wrap_content" android:text="@string/vendor" android:layout_marginTop="12dp"/>
</LinearLayout>
- As you might have noticed I am using a special background image here – you may download it from the Android Developers Website (there are multiply default backgrounds of different sizes you may use) or directly here. Create the directory res/drawable if it does not exist and put this image there.

Externalizing Resources
I like to extract information shared by multiple UI elements like sizes, paddings, margins and the Android SDK makes this really easy ..
Strings
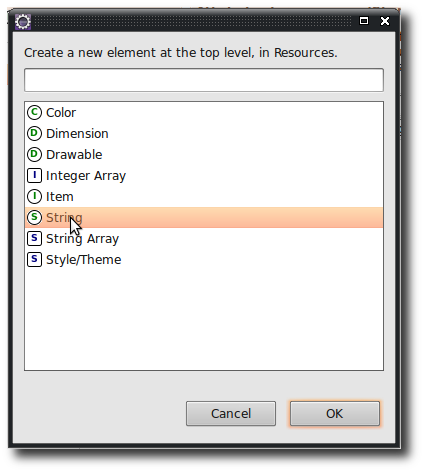
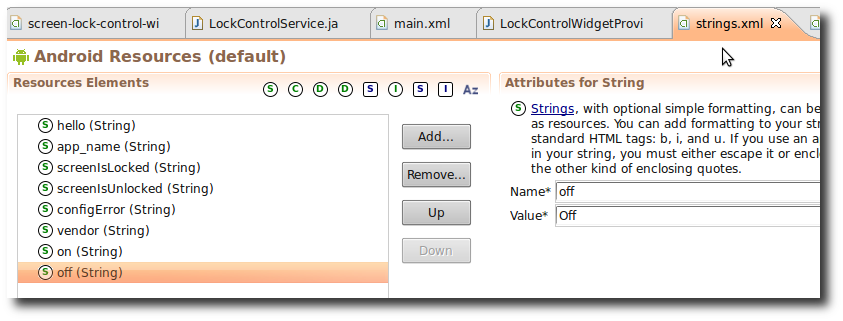
- Referenced strings are stored in res/values/strings, referenced by “@string/name” and may be edited using the resource editor
- My final strings.xml looks like this one
<?xml version="1.0" encoding="utf-8"?>
<resources>
 <string name="hello">Hello World!</string>
 <string name="app_name">Screen Lock Control Widget</string>
 <string name="screenIsLocked">Lock On</string>
 <string name="screenIsUnlocked">Lock Off</string>
 <string name="configError">Error</string>
 <string name="vendor">hasCode.com</string>
 <string name="on">On</string>
 <string name="off">Off</string>
</resources>
Dimensions
- Referenced strings are stored in res/values/dimens, referenced by “@dimens/name” and may be edited using the resource editor
- My final strings.xml looks like this one
<?xml version="1.0" encoding="utf-8"?>
<resources>
 <dimen name="text_margin_left">20dp</dimen>
 <dimen name="states_margin_top">20dp</dimen>
</resources>
Colors
- Create a new file in res/values named colors.xml
- Now the colours may be edited in the resource editor
- My final colors.xml is this one
<?xml version="1.0" encoding="utf-8"?>
<resources>
 <color name="red">#ff0000</color>
 <color name="green">#00ff00</color>
</resources>
Dimensions and unit of measure
If you’re wondering which unit of measure to use .. there are several choices ..
Source: developer.android.com. Dimensions
dp- Density-independent Pixels – an abstract unit that is based on the physical density of the screen. These units are relative to a 160 dpi (dots per inch) screen, so
160dpis always one inchregardless of the screen density. The ratio of dp-to-pixel will change with the screen density, but not necessarily in direct proportion. You should use these units when specifying view dimensions in your layout, so the UI properly scales to render at the same actual size on different screens. (The compiler accepts both “dip” and “dp”, though “dp” is more consistent with “sp”.) sp- Scale-independent Pixels – this is like the dp unit, but it is also scaled by the user’s font size preference. It is recommend you use this unit when specifying font sizes, so they will be adjusted for both the screen density and the user’s preference.
pt- Points – 1/72 of an inch based on the physical size of the screen.
px- Pixels – corresponds to actual pixels on the screen. This unit of measure is not recommended because the actual representation can vary across devices; each devices may have a different number of pixels per inch and may have more or fewer total pixels available on the screen.
mm- Millimeters – based on the physical size of the screen.
in- Inches – based on the physical size of the screen.
To keep it short .. use dp if you want to define sizes, margins and paddings for your view elements and use sp for font sizes.
More detailed information can be found in the Android Developer Resources Pages.
Creating the AppWidgetProvider
The AppWidgetProvider acts as our BroadcastReceiver
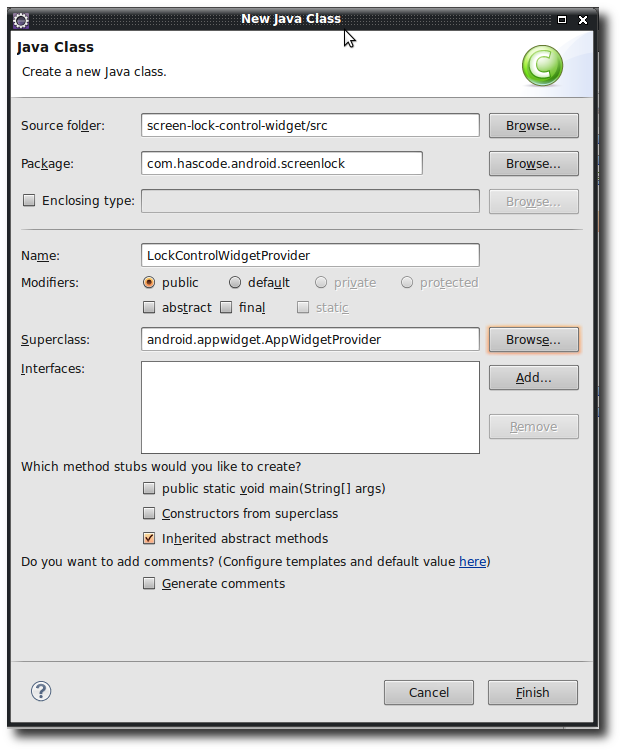
- Create a new class named LockControlWidgetProvider
- My final WidgetProvider looks like this one- don’t worry about the references to the LockControlService – we’re going to implement this one in the next step ..
package com.hascode.android.screenlock;

import android.app.PendingIntent;
import android.appwidget.AppWidgetManager;
import android.appwidget.AppWidgetProvider;
import android.content.Context;
import android.content.Intent;
import android.widget.RemoteViews;

public class LockControlWidgetProvider extends AppWidgetProvider {
 @Override
 public void onUpdate(Context context, AppWidgetManager appWidgetManager,
 int[] appWidgetIds) {

 // fetching our remote views
 RemoteViews remoteViews = new RemoteViews(context.getPackageName(),
 R.layout.main);

 // unlock intent
 final Intent unlockIntent = createIntent(context, appWidgetIds);
 unlockIntent.putExtra(LockControlService.EXTRA_LOCK_ACTIVATED, false);
 unlockIntent.setAction(LockControlService.ACTION_UNLOCK);
 final PendingIntent pendingUnlockIntent = createPendingIntent(context,
 unlockIntent);

 // lock intent
 final Intent lockIntent = createIntent(context, appWidgetIds);
 lockIntent.putExtra(LockControlService.EXTRA_LOCK_ACTIVATED, true);
 unlockIntent.setAction(LockControlService.ACTION_LOCK);
 final PendingIntent pendingLockIntent = createPendingIntent(context,
 lockIntent);

 // status intent
 final Intent statusIntent = createIntent(context, appWidgetIds);
 statusIntent.setAction(LockControlService.ACTION_LOCK);
 final PendingIntent pendingStatusIntent = createPendingIntent(context,
 statusIntent);

 // bind click events to the pending intents
 remoteViews.setOnClickPendingIntent(R.id.txtOn, pendingLockIntent);
 remoteViews.setOnClickPendingIntent(R.id.txtOff, pendingUnlockIntent);
 remoteViews.setOnClickPendingIntent(R.id.widget_root,
 pendingStatusIntent);

 appWidgetManager.updateAppWidget(appWidgetIds, remoteViews);
 context.startService(statusIntent);
 }

 private Intent createIntent(Context context, int[] appWidgetIds) {
 Intent updateIntent = new Intent(context.getApplicationContext(),
 LockControlService.class);
 updateIntent.putExtra(AppWidgetManager.EXTRA_APPWIDGET_IDS,
 appWidgetIds);
 return updateIntent;
 }

 private PendingIntent createPendingIntent(Context context,
 Intent updateIntent) {
 PendingIntent pendingIntent = PendingIntent.getService(
 context.getApplicationContext(), 0, updateIntent,
 PendingIntent.FLAG_UPDATE_CURRENT);
 return pendingIntent;
 }

}
- Now we need to configure our BroadcastReceiver for our application .. first create a new directory res/xml and create a configuration file named lockwidget_provider.xml and save it in this directory
<?xml version="1.0" encoding="UTF-8" ?>
<appwidget-provider
 xmlns:android="http://schemas.android.com/apk/res/android"
 android:minWidth="146dp"
 android:initialLayout="@layout/main"
 android:updatePeriodMillis="180000"
 android:minHeight="144dp"/>
- Finally we need to register our receiver in the AndroidManifest.xml - put the following markup in your application element
<receiver android:name="LockControlWidgetProvider">
 <intent-filter>
 <action android:name="android.appwidget.action.APPWIDGET_UPDATE" />
 </intent-filter>
 <meta-data android:name="android.appwidget.provider"
 android:resource="@xml/lockwidget_provider" />
</receiver>
Creating and Registering the Service
Now we’re ready to create a service that handles the actual work …
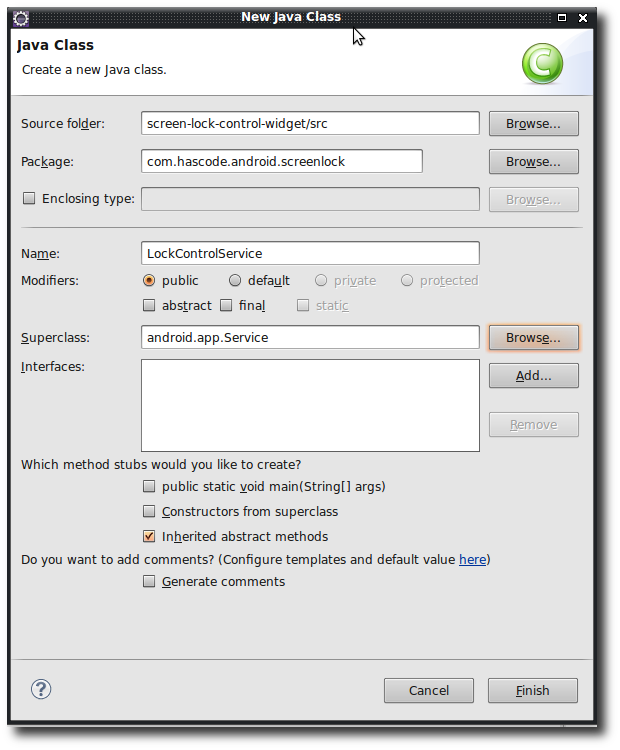
- Create a new class named LockControlService and let it extend Service
- My service class looks like this one
package com.hascode.android.screenlock;

import android.app.Service;
import android.appwidget.AppWidgetManager;
import android.content.Context;
import android.content.Intent;
import android.os.IBinder;
import android.provider.Settings;
import android.provider.Settings.SettingNotFoundException;
import android.util.Log;
import android.widget.RemoteViews;

public class LockControlService extends Service {
 public static final String EXTRA_LOCK_ACTIVATED = "com.hascode.android.lockwidget.activated";
 public static final String ACTION_LOCK = "com.hascode.android.lockwidget.lock";
 public static final String ACTION_UNLOCK = "com.hascode.android.lockwidget.unlock";
 public static final String ACTION_STATUS = "com.hascode.android.lockwidget.status";

 private static final int DEFAULT_TIMEOUT_MILLIS = 30000;
 private static final String APP_TAG = "com.hascode.android.lockwidget";

 @Override
 public void onStart(Intent intent, int startId) {
 AppWidgetManager widgetManager = AppWidgetManager.getInstance(this
 .getApplicationContext());

 // fetch widgets to be updated
 int[] widgetIds = intent
 .getIntArrayExtra(AppWidgetManager.EXTRA_APPWIDGET_IDS);
 if (widgetIds.length > 0) {
 // fetching timeout, setting status
 for (int widgetId : widgetIds) {
 RemoteViews remoteViews = new RemoteViews(getPackageName(),
 R.layout.main);
 if (intent.hasExtra(EXTRA_LOCK_ACTIVATED)) {
 Log.d(APP_TAG, "intent has extra enableLock");
 if (intent.getBooleanExtra(EXTRA_LOCK_ACTIVATED, true)) {
 lockOn();
 } else {
 lockOff();
 }
 } else {
 Log.d(APP_TAG, "intent has no extra enableLock");
 }
 printStatus(getApplicationContext(), remoteViews);
 widgetManager.updateAppWidget(widgetId, remoteViews);
 }
 stopSelf();
 }
 super.onStart(intent, startId);
 }

 private void lockOff() {
 Log.d(APP_TAG, "lock settings from intent: enable=true");
 Settings.System.putInt(getContentResolver(),
 Settings.System.SCREEN_OFF_TIMEOUT, -1);
 }

 private void lockOn() {
 Log.d(APP_TAG, "lock settings from intent: enable=false");
 Settings.System.putInt(getContentResolver(),
 Settings.System.SCREEN_OFF_TIMEOUT, DEFAULT_TIMEOUT_MILLIS);
 }

 @Override
 public IBinder onBind(Intent intent) {
 return null;
 }

 private void printStatus(final Context context,
 final RemoteViews remoteViews) {
 int screenTimeoutMillis = 0;
 CharSequence status = getText(R.string.configError);
 try {
 screenTimeoutMillis = android.provider.Settings.System.getInt(
 context.getContentResolver(),
 Settings.System.SCREEN_OFF_TIMEOUT);
 } catch (SettingNotFoundException e) {
 Log.e(APP_TAG, "reading settings failed");
 }

 if (-1 == screenTimeoutMillis) {
 status = getText(R.string.screenIsUnlocked);
 } else {
 status = getText(R.string.screenIsLocked);
 }
 remoteViews.setTextViewText(R.id.tvTime, status);
 }
}
- It is not very elegant though to set the screen lock timeout to a fixed value but for a tutorial I suppose it is sufficient.
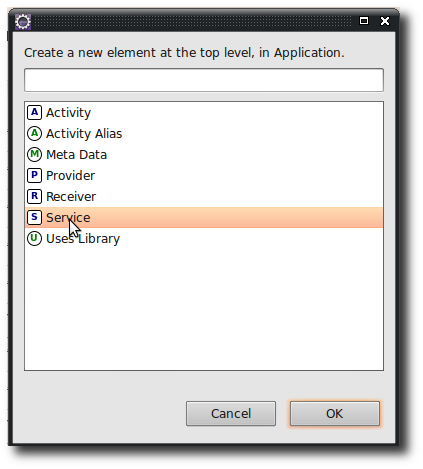
- Now the service must be registered for our application so add it to the AndroidManifest
- Another solution is to simply add the following markup to the AndroidManifest.xml in the application-element
<service android:enabled="true" android:name="LockControlService">
Adjusting the Permissions
We need to declare exactly one permission to enable our application to run …
- Add the following permission WRITE_SETTINGS as a USES-PERMISSION to the AndroidManifest by using the graphical editor or by simply adding the following markup to the manifest-element in the AndroidManifest.xml
<uses-permission android:name="android.permission.WRITE_SETTINGS"></uses-permission>
The final AndroidManifest.xml
That’s what my final manifest looks like .. you don’t need the android:debuggable=”true” but I like to debug from my connected smartphone and therefore need this flag..
<?xml version="1.0" encoding="utf-8"?>
<manifest xmlns:android="http://schemas.android.com/apk/res/android"
 package="com.hascode.android.screenlock" android:versionCode="1"
 android:versionName="1.0">
 <uses-sdk android:minSdkVersion="8" />
 <uses-permission android:name="android.permission.WRITE_SETTINGS"></uses-permission>

 <application android:icon="@drawable/icon" android:label="@string/app_name" android:debuggable="true">
 <service android:enabled="true" android:name="LockControlService">
 </service>
 <receiver android:name="LockControlWidgetProvider">
 <intent-filter>
 <action android:name="android.appwidget.action.APPWIDGET_UPDATE" />
 </intent-filter>
 <meta-data android:name="android.appwidget.provider"
 android:resource="@xml/lockwidget_provider" />
 </receiver>

 </application>
</manifest>
Running the Application
Now it’s time to run the application on the emulator …
- If using Eclipse, select Run as > Android Application
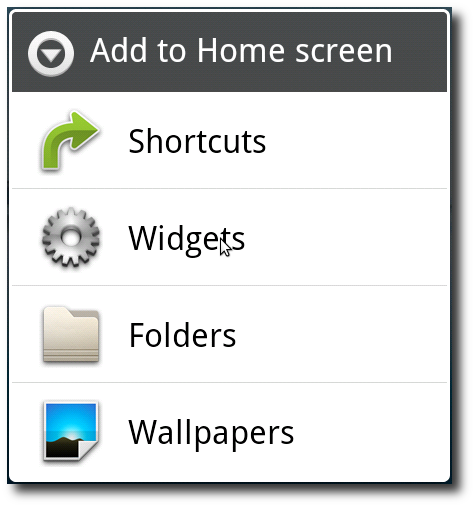
- After the emulator has started, add the widget to your home screen
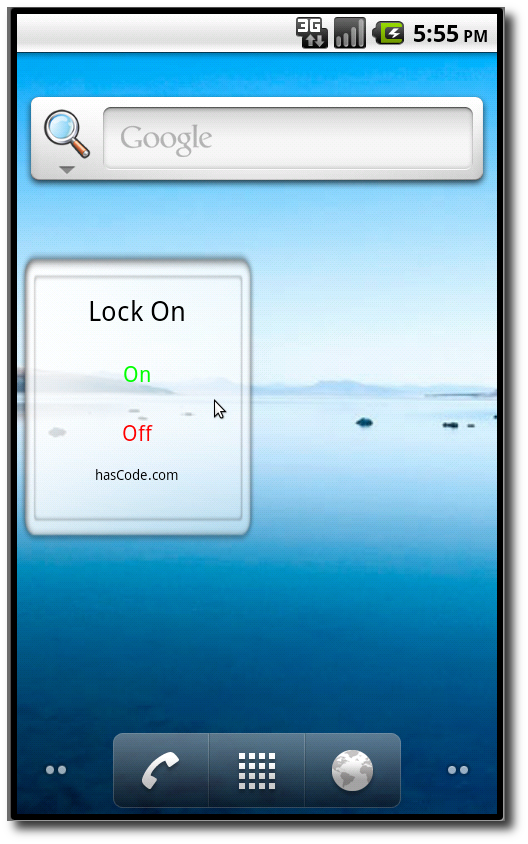
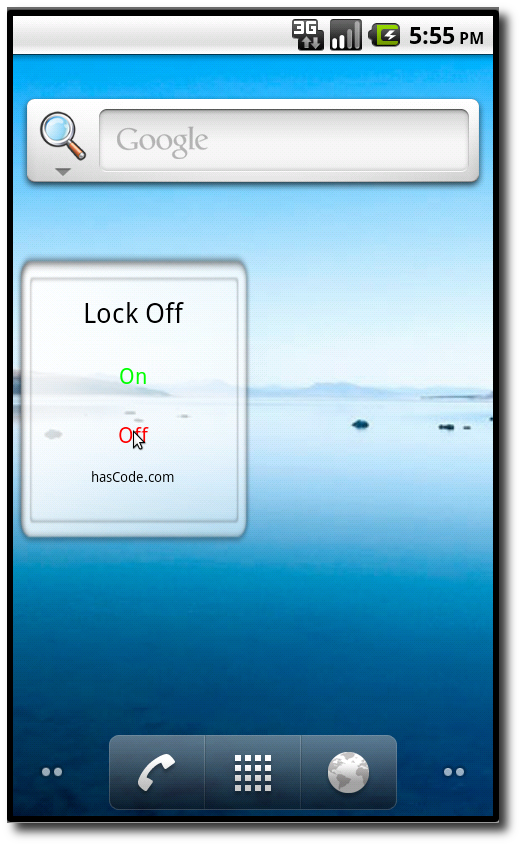
- You should be able to control your screen settings using the widget by now – just click on the On or Off text .. see the screenshots above
Running/Debugging on your Smartphone
If you need to debug your application on a specific target device/smartphone be sure to have the corresponding USB driver installed – for detailed information please take a look at the Android documentation: “Android Developers: Using Hardware Devices“.
You need to enable USB Debugging in you smartphone’s settings (Application > Development) first, afterwards connect your smartphone to your workstation.
If the device is recognized can be tested by running the following command (HT044PL06765 is the id of my HTC Desire smartphone):
user@host[~] $ adb devices
List of devices attached
HT044PL06765    device
In addition you should set android:debuggable=”true” in your application’s manifest file.
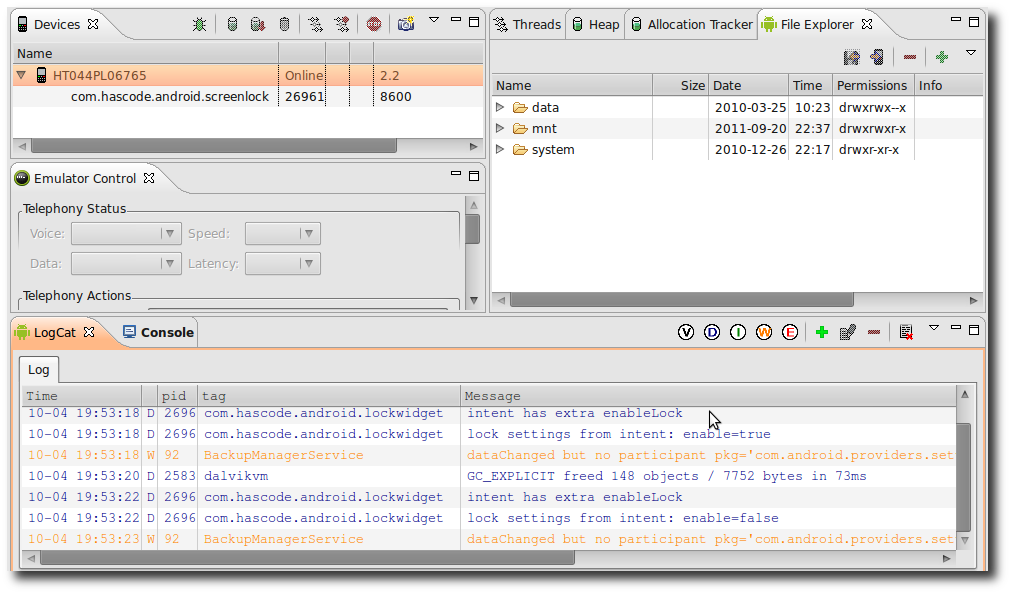
You should now be able to connect your IDE to the device (using the DDMS Perspective)
Tutorial Sources
I have put the source from this tutorial on my Bitbucket repository – download it there or check it out using Mercurial:
hg clone https://bitbucket.org/hascode/android-widget-tutorial
Troubleshooting
- “Empty extras received from Intent/PendingIntent” – You need to specify an action for your different intents or else the runtime environment is not able to differ between the intents .. set the action via intent.setAction() and be sure to to this before you’re creating a new PendingIntent from the given Intent. In addition be sure not to have set the PendingIntent’s mode to PendingIntent.FLAG_ONE_SHOT in the factory method .. if you’re unsure use PendingIntent.FLAG_UPDATE_CURRENT
Resources
- Kasper Holtze: How to make a simple Android widget
- Lars Vogel: Developing Android Widgets
- Android Developers: Widget Design Guidelines
- Android Developers: Using Hardware Devices
- Pierre Dahlström: How to debug Android applications on your phone
- Android Developers: USB Vendor IDs
- Android Developers: Dimensions
Tags: adb, Android, appwidgetprovider, intent, mobile, service, smartphone, tutorial, widget




March 6th, 2013 at 11:26 am
Very interesting!
However I cannot find downloadable version in the download section (https://bitbucket.org/hascode/android-widget-tutorial/downloads).
May you provide it? I don’t have neither Git software nor BitBucket account yet.
Thank you very much.
March 6th, 2013 at 8:13 pm
Hi,
thanks for your kind feedback! If you click on the tabs in the download section (“Tags” or “Branches”) – you’re able to download the project as zip, gz or bzip compressed file :)
October 12th, 2013 at 7:49 am
It’s very good~ althought I can’t understand…
September 13th, 2015 at 12:22 pm
I have a doubt cant we design a screen lock app.As we have in mobiles we use to swipe it in google nexus tab.can i know how to design.any one have the idea how to design it.if yes please let me know.i wanna try on it.