There are a lot of frameworks out there to create offline applications and rich clients in Java.
One exotic alternative is to use the HTML, CSS and Javascript for this purpose and render the application in a Java frame using SWT and SWT’s browser component.
Creating a new Project
We’re using maven here for our project but you shouldn’t have a problem to use SBT, Gradle or Ivy instead…
Adding Maven Dependencies
We need two things .. first comes a repository for the swt dependencies …
<repositories>
    <repository>
        <id>swt-maven-repo</id>
        <url>https://swt-repo.googlecode.com/svn/repo/</url>
    </repository>
</repositories>
Second we need one platform dependency for swt ..
<dependencies>
    <dependency>
        <groupId>org.eclipse.swt</groupId>
        <artifactId>${swt.os.type}</artifactId>
        <version>3.8</version>
    </dependency>
</dependencies>
We’ll be setting the artifactId in the next step..
Supporting different Operating Systems
Different dependencies for the different operation systems and bit variants … I am using maven profiles here to handle this .. by adding a parameter -PprofileId you may select your appropriate system.
I am using a 64bit linux OS, that’s why I have enabled the corresponding profile as default profile by setting activeByDefault to true.
<profiles>
    <profile>
        <id>linux_32</id>
        <activation>
            <os>
                <name>linux_x32</name>
            </os>
        </activation>
        <properties>
            <swt.os.type>org.eclipse.swt.gtk.linux.x86</swt.os.type>
        </properties>
    </profile>
    <profile>
        <id>linux_64</id>
        <activation>
            <os>
                <name>linux</name>
            </os>
            <activeByDefault>true</activeByDefault>
        </activation>
        <properties>
            <swt.os.type>org.eclipse.swt.gtk.linux.x86_64</swt.os.type>
        </properties>
    </profile>
    <profile>
        <id>mac_64</id>
        <activation>
            <os>
                <name>mac os x 64</name>
            </os>
        </activation>
        <properties>
            <swt.os.type>org.eclipse.swt.cocoa.macosx.x86_64</swt.os.type>
            <platformVmArgs>-XstartOnFirstThread</platformVmArgs>
        </properties>
    </profile>
    <profile>
        <id>windows_32</id>
        <activation>
            <os>
                <family>windows</family>
            </os>
        </activation>
        <properties>
            <swt.os.type>org.eclipse.swt.win32.win32.x86</swt.os.type>
        </properties>
    </profile>
    <profile>
        <id>windows_64</id>
        <activation>
            <os>
                <family>windows_x64</family>
            </os>
        </activation>
        <properties>
            <swt.os.type>org.eclipse.swt.win32.win32.x86_64</swt.os.type>
        </properties>
    </profile>
</profiles>
Building the SWT Frame Application
We’re building a simple swt frame application here and use swt’s browser element to render our application.
Important here is the BrowserFunction in line 45 .. this adds a Javascript function to the scope of the HTML “app” named jsToSwtCallback.
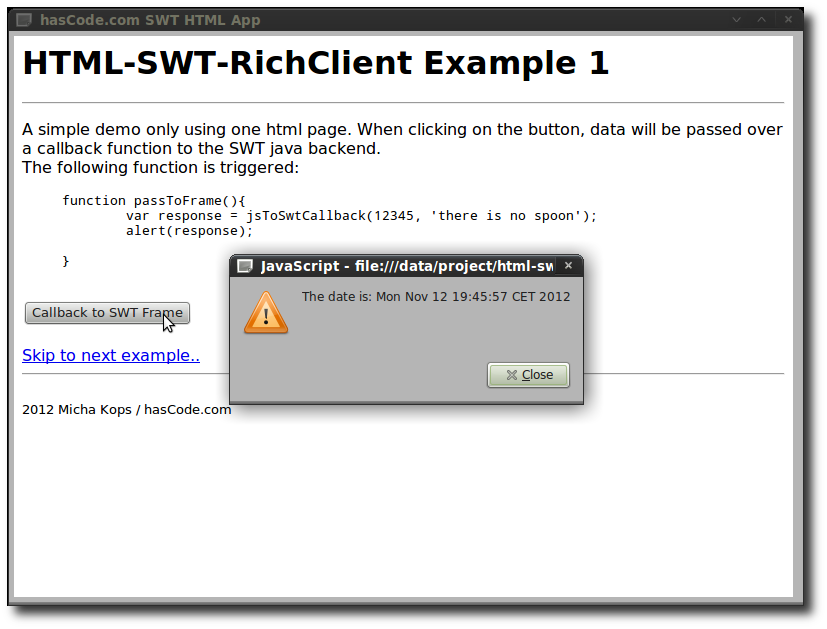
This function logs alle parameters passed to from the html page to the java swt frame application and returns a string back to the javascript with the current date.
This is my application:
package com.hascode.app;

import java.io.File;
import java.util.Date;

import org.eclipse.swt.SWT;
import org.eclipse.swt.browser.Browser;
import org.eclipse.swt.browser.BrowserFunction;
import org.eclipse.swt.layout.GridData;
import org.eclipse.swt.layout.GridLayout;
import org.eclipse.swt.widgets.Display;
import org.eclipse.swt.widgets.Shell;

public class RichClient {
 private static final int APP_HEIGHT = 600;
 private static final int APP_WIDTH = 800;
 private static final String APP_TITLE = "hasCode.com SWT HTML App";
 private static final File HTML_FILE = new File("app/main.html");

 private Shell shell;
 private Display display;
 private Browser browser;
 private GridData browserLayout;

 public static void main(final String... args) {
 new RichClient().initializeApplication();
 }

 public void initializeApplication() {
 display = new Display();

 shell = new Shell(display);
 shell.setText(APP_TITLE);
 shell.setSize(APP_WIDTH, APP_HEIGHT);
 shell.setLayout(new GridLayout());

 browser = new Browser(shell, SWT.NONE);
 browserLayout = new GridData(GridData.FILL_BOTH);
 browserLayout.grabExcessHorizontalSpace = true;
 browserLayout.grabExcessVerticalSpace = true;
 browser.setLayoutData(browserLayout);

 browser.setUrl(HTML_FILE.toURI().toString());

 final BrowserFunction debugCallback = new CallbackDebugFunction(
 browser, "jsToSwtCallback");
 System.out.println("browser initialized");

 shell.open();
 while (!shell.isDisposed()) {
 if (!display.readAndDispatch()) {
 display.sleep();
 }
 }
 display.dispose();
 }

 static class CallbackDebugFunction extends BrowserFunction {
 public CallbackDebugFunction(final Browser browser, final String name) {
 super(browser, name);
 }

 @Override
 public Object function(final Object[] arguments) {
 System.out.println("callback triggered by js function");
 for (final Object o : arguments) {
 System.out.println("argument received: " + o.toString());
 }
 return "The date is: " + new Date().toString();
 }

 }

}
HTML Layouts
Now that we’ve got our frame application we’re ready to create a simple layout. The only interesting thing here is the jsToSwtCallback javascript function .. this one is created by the frame application and allows to pass data between html scope and the java application.
First example: A simple layout

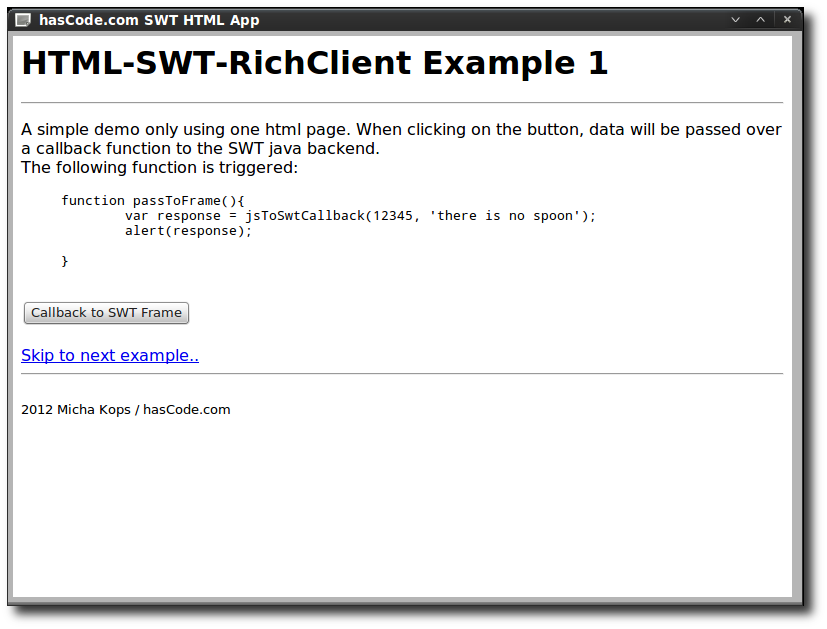
This is the code for our first, simple layout
<html>
 <head>
 <title>hasCode.com HTML-SWT-RichClient Example 1</title>
 <script type="text/javascript">
 function passToFrame(){
 var response = jsToSwtCallback(12345, 'there is no spoon');
 alert(response);

 }
 </script>
 </head>
 <body>
 <h1>HTML-SWT-RichClient Example 1</h1>
 <hr/>
 <p>
 A simple demo only using one html page. When clicking on the button, data will be passed over a callback function to the SWT java backend.
 <br/>
 The following function is triggered:<br/>
 <blockquote><pre>
function passToFrame(){
 var response = jsToSwtCallback(12345, 'there is no spoon');
 alert(response);

}
 </pre></blockquote>
 </p>
 <input type="button" value="Callback to SWT Frame" onclick="javascript:passToFrame()"/>
 <br/>
 <br/>
 <a href="main-with-layout.html">Skip to next example..</a>
 <hr/>
 <br/>
 <small>2012 Micha Kops / hasCode.com</small>
 </body>
</html>
Clicking the button should look like this

Second example: Using Bootstrap.js
In the next example we’re going to pimp our layout by using bootstrap.js – so we’re adding these libraries and the jQuery library to our app directory.

My directory structure now looks like this:
.
├── app
│   ├── css
│   │   ├── bootstrap.css
│   │   ├── bootstrap.min.css
│   │   ├── bootstrap-responsive.css
│   │   └── bootstrap-responsive.min.css
│   ├── img
│   │   ├── glyphicons-halflings.png
│   │   └── glyphicons-halflings-white.png
│   ├── js
│   │   ├── bootstrap.js
│   │   ├── bootstrap.min.js
│   │   └── jquery.min.js
│   ├── main.html
│   └── main-with-layout.html
├── pom.xml
├── README.md
└── src
├── main
│   ├── java
│   │   └── com
│   │       └── hascode
│   │           └── app
│   │               └── RichClient.java
│   └── resources
└── test
├── java
└── resources

14 directories, 14 files
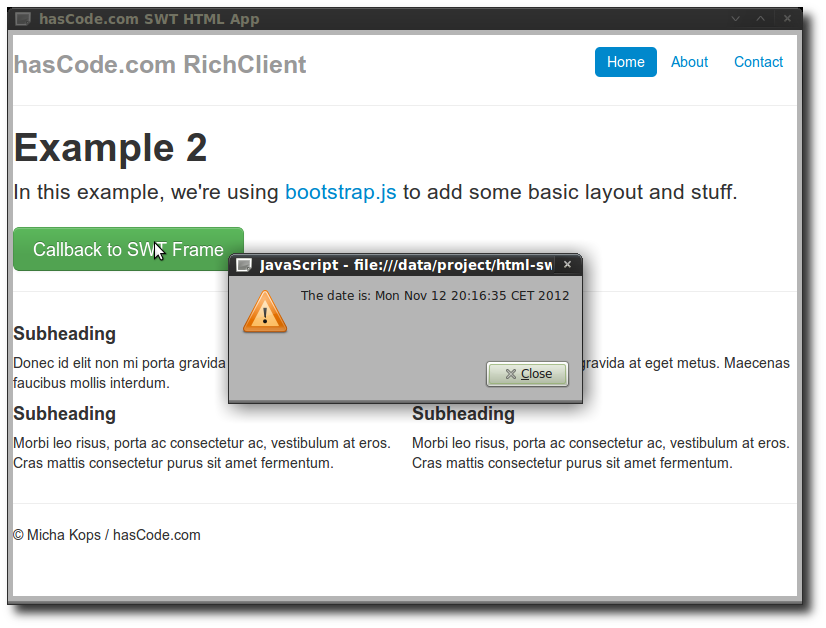
And this is my new template – I’ve take and modified an example from the bootstrap.js homepage here
<!DOCTYPE html>
<html>
<head>
<title>hasCode.com HTML-SWT-RichClient Example 2</title>
<link href="css/bootstrap.min.css" rel="stylesheet" media="screen">
</head>
<body>
<div>
<div>
<ul>
<li><a href="#">Home</a></li>
<li><a href="#">About</a></li>
<li><a href="#">Contact</a></li>
</ul>
<h3>hasCode.com RichClient</h3>
</div>
<hr />
<div>
<h1>Example 2</h1>
<p>
In this example, we're using <a
href="http://twitter.github.com/bootstrap/">bootstrap.js</a> to add
some basic layout and stuff.
</p>
<input type="button" id="swt-callback"
value="Callback to SWT Frame" />
</div>
<hr />
<div>
<div>
<h4>Subheading</h4>
<p>Donec id elit non mi porta gravida at eget metus. Maecenas
faucibus mollis interdum.</p>
<h4>Subheading</h4>
<p>Morbi leo risus, porta ac consectetur ac, vestibulum at eros.
Cras mattis consectetur purus sit amet fermentum.</p>
</div>
<div>
<h4>Subheading</h4>
<p>Donec id elit non mi porta gravida at eget metus. Maecenas
faucibus mollis interdum.</p>
<h4>Subheading</h4>
<p>Morbi leo risus, porta ac consectetur ac, vestibulum at eros.
Cras mattis consectetur purus sit amet fermentum.</p>
</div>
</div>
<hr>
<div>
<p>© Micha Kops / hasCode.com</p>
</div>
</div>
<script src="./js/jquery.min.js"></script>
<script type="text/javascript">
$(document).ready(function(){
$('#swt-callback').click(function(){
var response = jsToSwtCallback(12345, 'there is no spoon');
alert(response);
});
});
</script>
</body>
</html>Clicking the big green button should display the following result

Running the Application
When we’re running the full application we should be able to see a similar result like in this screencast on YouTube.
Tutorial Sources
Please feel free to download the tutorial sources from my GitHub repository, fork it there or clone it using Git:
git clone https://github.com/hascode/swt-html-richclient.gitResources
Article Updates
-
2018-06-01: Embedded YouTube video removed (GDPR/DSGVO).
