The Tomcat Maven Plugin not only allows us to deploy our mavenized application to an existing Tomcat server but also to run our web application with an embedded instance from our project’s directory. Recently I needed to add basic authentication to such an instance and wanted to share the steps necessary here
Prerequisites
We just need Maven and a JDK …
Project Setup
-
I am using the webapp archetype here
-
We’re adding the following configuration for the Tomcat plugin to your pom.xml – my final descriptor is this one
pom.xml<?xml version="1.0"?> <project xmlns="http://maven.apache.org/POM/4.0.0" xmlns:xsi="http://www.w3.org/2001/XMLSchema-instance" xsi:schemaLocation="http://maven.apache.org/POM/4.0.0 http://maven.apache.org/maven-v4_0_0.xsd"> <modelVersion>4.0.0</modelVersion> <groupId>com.hascode.sample</groupId> <artifactId>maven-tomcat-embedded-auth</artifactId> <packaging>war</packaging> <version>0.0.1-SNAPSHOT</version> <name>Maven Embedded Tomcat Basic Auth Sample</name> <url>https://www.hascode.com</url> <build> <finalName>maven-tomcat-embedded-auth</finalName> <plugins> <plugin> <groupId>org.codehaus.mojo</groupId> <artifactId>tomcat-maven-plugin</artifactId> <version>1.1</version> <configuration> <mode>both</mode> <path>/tcembed</path> </configuration> </plugin> </plugins> </build> </project> -
The path node configures the context path for the web application – if we don’t specify it, the artifactId is used
Adding Authentication
Now that we’ve got a mavenized project we need to configure our web application …
-
First we’re going to edit our src/main/webapp/WEB-INF/web.xml – we’re adding a security constraint that is applied for all requests to a path that matches "/secure" and permit access to users that match the role ‘admin‘. The role is also defined here. My web.xml looks like this
<?xml version="1.0" encoding="UTF-8"?> <web-app xmlns="http://java.sun.com/xml/ns/j2ee" xmlns:xsi="http://www.w3.org/2001/XMLSchema-instance" version="2.4" xsi:schemaLocation="http://java.sun.com/xml/ns/j2ee http://java.sun.com/xml/ns/j2ee/web-app_2_4.xsd"> <welcome-file-list> <welcome-file>/test.jsp</welcome-file> </welcome-file-list> <security-role> <role-name>admin</role-name> </security-role> <security-constraint> <display-name>MySecurityConstraint</display-name> <web-resource-collection> <web-resource-name>securedresources</web-resource-name> <url-pattern>/secure/*</url-pattern> </web-resource-collection> <auth-constraint> <role-name>admin</role-name> </auth-constraint> </security-constraint> <login-config> <auth-method>BASIC</auth-method> <realm-name>hasCode.com Secured Area</realm-name> </login-config> </web-app> -
Now we need a valid user that fulfils the defined role ‘admin‘ and some credentials for his authentication. In a normal Tomcat server we could add a user to the____tomcat-users.xml but here we have an embedded instance – but this is no problem .. the Tomcat Maven Plugin searches for a directory src/main/tomcatconf and if it exists it is copied to the configuration of the embedded instance.
-
So we’re creating a new directory src/main/tomcatconf and adding a file named tomcat-users.xml with the following content
<?xml version="1.0" encoding="UTF-8"?> <tomcat-users> <user name="admin" password="admin" roles="admin" /> </tomcat-users> -
As you can see we’re going to have a user "admin" with password "admin" and role "admin" .. very imaginative :)
Adding Content
Now that everything is secured we’re in need for some content to display and proof the correctness of our configuration …
-
First we’re creating a simple JSP that displays a text and a link to the secured JSP (that is created in the next step). This JSP is also used as welcome file – so we’re creating a file named test.jsp in src/main/webapp
<html><head></head><body> <h1>This is a test page</h1> <a href="/tcembed/secure/info.jsp">To the restricted area</a> </body></html> -
Now our secured JSP named info.jsp to be saved in src/main/webapp/secure
<html><head></head><body>
<h1>This is some sensitive information</h1>
</body></html>
Run the Application
Now it’s time to test the application
-
Run the web application using the Tomcat Maven Plugin by running
mvn tomcat:run -
You should see some output in your console – this also gives you a hint what the URL to your application looks like
[INFO] Running war on http://localhost:8080/tcembed -
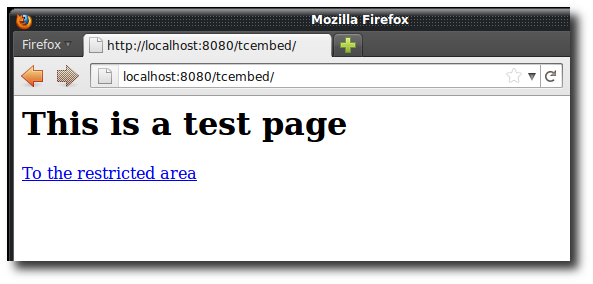
Now open the following address in your browser: http://localhost:8080/tcembed/ you should be able to see the following screen
 Figure 1. Accessing the unsecured JSP in the browser
 -
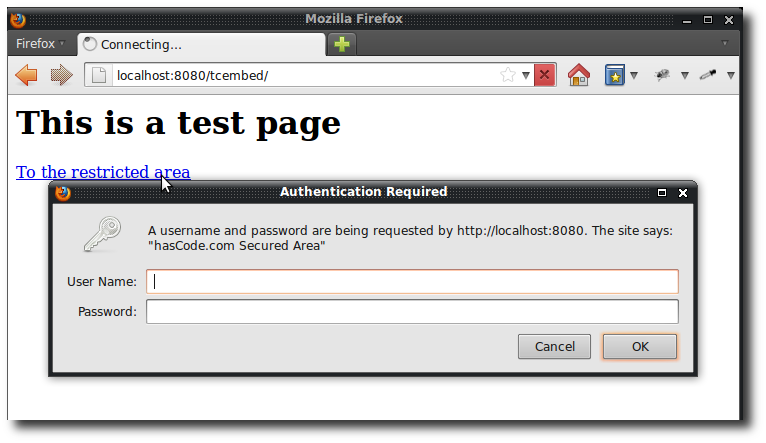
Now click on the link – you should see the following prompt
 Figure 2. Basic Authentication: The login prompt to access the restricted JSP
 -
Enter admin and admin and you should be able to see the secured JSP
 Figure 3. Viewing the secured JSP in the browser
Tutorial Sources
I have put the source from this tutorial on my GitHub repository – download it there or check it out using Git:
git clone https://github.com/hascode/maven-embedded-tomcat-auth-tutorial.git