Recently I needed to control an embedded web container from a Java application and I wanted to see how this could be achieved using an embedded instance of either Tomcat or Jetty here.
In the following short examples I would like to show how to embed both servers in an application in no time using Gradle or Maven as build tool.
Dependencies
We just need to add the web container libraries to our project here .. I’ve added the build config for Gradle and Maven here…
Gradle
Adding the following instructions to our build.gradle adds everything needed here .. the dependencies for tomcat and jetty and a gradle task to run the application and read user input from STDIN (and other stuff to create project files for Eclipse IDE..)..
apply plugin: 'java'
apply plugin: 'eclipse'

repositories {
    mavenCentral()
}

dependencies {
    compile 'org.eclipse.jetty:jetty-server:9.0.0.RC2'
    compile 'org.eclipse.jetty:jetty-servlet:9.0.0.RC2'
    compile 'org.apache.tomcat:tomcat-catalina:7.0.41'
    compile 'org.apache.tomcat:tomcat-util:7.0.41'
    compile 'org.apache.tomcat.embed:tomcat-embed-core:7.0.41'
}

sourceCompatibility = 1.7
targetCompatibility = 1.7

task(selectServer, dependsOn: 'classes', type: JavaExec) {
    main = 'com.hascode.tutorial.app.Main'
    classpath = sourceSets.main.runtimeClasspath
    standardInput= System.in
}

defaultTasks 'selectServer'
Maven
If you prefer Maven, please add the following dependencies to your pom.xml:
<dependencies>
	<dependency>
		<groupId>org.eclipse.jetty</groupId>
		<artifactId>jetty-server</artifactId>
		<version>9.0.0.RC2</version>
	</dependency>
	<dependency>
		<groupId>org.eclipse.jetty</groupId>
		<artifactId>jetty-servlet</artifactId>
		<version>9.0.0.RC2</version>
	</dependency>
	<dependency>
		<groupId>org.apache.tomcat</groupId>
		<artifactId>tomcat-catalina</artifactId>
		<version>7.0.41</version>
	</dependency>
	<dependency>
		<groupId>org.apache.tomcat</groupId>
		<artifactId>tomcat-util</artifactId>
		<version>7.0.41</version>
	</dependency>
	<dependency>
		<groupId>org.apache.tomcat.embed</groupId>
		<artifactId>tomcat-embed-core</artifactId>
		<version>7.0.41</version>
	</dependency>
</dependencies>
Now we’re ready to create a simple web application …
The Application
The main application here allows us to choose the server we want to start by reading our choice from the command line.
Pressing “1″ starts our embedded Jetty server, pressing “2″ starts a Tomcat server….
package com.hascode.tutorial.app;

import java.io.BufferedReader;
import java.io.IOException;
import java.io.InputStreamReader;

import org.apache.catalina.LifecycleException;

import com.hascode.tutorial.container.JettyEmbeddedRunner;
import com.hascode.tutorial.container.TomcatEmbeddedRunner;

public class Main {
	public static void main(final String[] args) throws IOException,
			LifecycleException {
		System.out
				.println("### STARTING EMBEDDED WEB CONTAINER\nPlease select your container...\n1) Jetty\n2) Tomcat\n");
		BufferedReader bufferRead = new BufferedReader(new InputStreamReader(
				System.in));
		String input = bufferRead.readLine();
		if ("1".equals(input)) {
			System.out.println("Starting Jetty ..");
			new JettyEmbeddedRunner().startServer();
		} else if ("2".equals(input)) {
			System.out.println("Starting Tomcat ..");
			new TomcatEmbeddedRunner().startServer();
		} else {
			System.out.println("Nothing selected .. quitting application...");
		}

	}
}
The HTTP Servlet
We’re creating a simple servlet here by extending javax.servlet.http.HttpServlet.
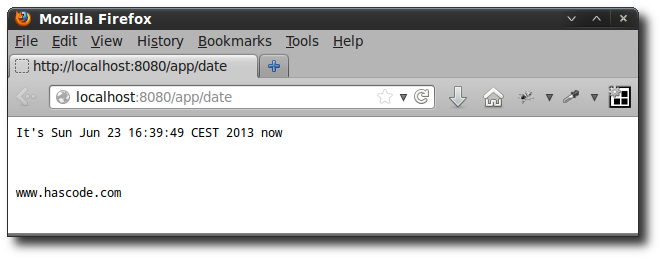
Our servlet simply prints a timestamp to the output stream … that’s all …
package com.hascode.tutorial.servlet;

import java.io.IOException;
import java.util.Date;

import javax.servlet.ServletException;
import javax.servlet.http.HttpServlet;
import javax.servlet.http.HttpServletRequest;
import javax.servlet.http.HttpServletResponse;

public class DatePrintServlet extends HttpServlet {
	private static final long serialVersionUID = 1L;

	@Override
	protected void doGet(final HttpServletRequest req,
			final HttpServletResponse res) throws ServletException, IOException {
		res.getWriter()
				.append(String.format("It's %s now\n\n\n\nwww.hascode.com",
						new Date()));
	}
}
Jetty embedded
This is our code to startup an embedded Jetty server instance, running on port 8080 with context-path “app” and our DatePrintServlet registered:
package com.hascode.tutorial.container;

import org.eclipse.jetty.server.Server;
import org.eclipse.jetty.server.ServerConnector;
import org.eclipse.jetty.servlet.ServletContextHandler;
import org.eclipse.jetty.servlet.ServletHolder;

import com.hascode.tutorial.servlet.DatePrintServlet;

public class JettyEmbeddedRunner {
	public void startServer() {
		try {
			Server server = new Server();
			ServerConnector c = new ServerConnector(server);
			c.setIdleTimeout(1000);
			c.setAcceptQueueSize(10);
			c.setPort(8080);
			c.setHost("localhost");
			ServletContextHandler handler = new ServletContextHandler(server,
					"/app", true, false);
			ServletHolder servletHolder = new ServletHolder(
					DatePrintServlet.class);
			handler.addServlet(servletHolder, "/date");
			server.addConnector(c);
			server.start();
		} catch (Exception e) {
			e.printStackTrace();
		}
	}
}
Tomcat embedded
The following lines start a new Tomcat instance, running on port 8080 with context-path “app” and our DatePrintServlet registered, corresponding to the Jetty configuration above.
package com.hascode.tutorial.container;

import java.io.File;

import org.apache.catalina.Context;
import org.apache.catalina.LifecycleException;
import org.apache.catalina.startup.Tomcat;

import com.hascode.tutorial.servlet.DatePrintServlet;

public class TomcatEmbeddedRunner {
	public void startServer() throws LifecycleException {
		Tomcat tomcat = new Tomcat();
		tomcat.setPort(8080);
		File base = new File(System.getProperty("java.io.tmpdir"));
		Context rootCtx = tomcat.addContext("/app", base.getAbsolutePath());
		Tomcat.addServlet(rootCtx, "dateServlet", new DatePrintServlet());
		rootCtx.addServletMapping("/date", "dateServlet");
		tomcat.start();
		tomcat.getServer().await();
	}
}
Directory Structure
This is what my directory structure looks like:
$ tree
.
├── build.gradle
├── README.md
└── src
 └── main
 ├── java
 │   └── com
 │       └── hascode
 │           └── tutorial
 │               ├── app
 │               │   └── Main.java
 │               ├── container
 │               │   ├── JettyEmbeddedRunner.java
 │               │   └── TomcatEmbeddedRunner.java
 │               └── servlet
 │                   └── DatePrintServlet.java
 └── resources
Running the Application
We’re now ready to run our application using the gradle task we’ve defined in the build.gradle.
When typing “1″ or “2″ the application should start either an embedded Jetty or an embedded Tomcat.
Afterwards the web application is accessible by opening the following address in your browser: http://localhost:8080/app/date
$ gradle selectServer
:compileJava UP-TO-DATE
:processResources UP-TO-DATE
:classes UP-TO-DATE
:selectServer
### STARTING EMBEDDED WEB CONTAINER
Please select your container...
1) Jetty
2) Tomcat
Screenshot
This is what our application looks like in the browser.

Tutorial Sources
Please feel free to download the tutorial sources from my GitHub repository, fork it there or clone it using Git:
git clone https://github.com/hascode/webapp-embedded-tutorial.gitResources
Updates
-
2014-05-24: Maven dependency coordinates fixed, clean shutdown control for Tomcat added (thx @Claude Quézel)
-
2014-10-12: Typo in build.gradle fixed (thx @Sascha Kratky)
