Testing Asynchronous Applications with Java and Awaitility
August 23rd, 2015 by Micha KopsWriting tests for asynchronous applications has never been much fun as we’re always struggling with the problem how to determine state changes, handle process terminations, dealing with timeouts or failures and stuff like this.
Awaitility eases this process for us offering a nice DSL, rich support for languages like Scala or Groovy and an easy-to-use syntax that’s even more fun when using it with Java 8′s lambda expressions.
In the following short introduction I’d like to demonstrate writing some tests different scenarios.

Awaitility and JUnit in Action
Contents
Dependencies
We just need to add the dependencies for Awaitility and JUnit to our build.gradle (or pom.xml, build.sbt or whatever..) so that my Gradle build files is looking like this now:
apply plugin: 'java'
apply plugin: 'eclipse'

sourceCompatibility = 1.8

repositories {
    mavenCentral()
}

dependencies {
    compile 'com.jayway.awaitility:awaitility:1.6.3'
    testCompile 'org.hamcrest:hamcrest-all:1.3'
    testCompile 'junit:junit:4.12'
}
Asynchronous Testing
The following test is based on a simple application that allows to create a user by delegating this action over an event bus (for more details about this sample application, please feel free to skip to the chapter Appendix : UserService Application using Guava’s Event Bus).
The user service triggers the event, and finally the user repository (named UserStore) enables us to fetch existing users and query users by their name.
When the first user is created, we’re working with a fixed delay (assuming that 2 seconds are enough to complete the process), for the second user, we’re using the user repository (amount of stored users) as an indicator of progress here.
As I’m covering only some basic features here, I’d highly recommend to jump over to the Awaitility User Manual!
package it;

import static com.jayway.awaitility.Awaitility.await;
import static org.hamcrest.Matchers.equalTo;
import static org.hamcrest.Matchers.notNullValue;
import static org.junit.Assert.assertThat;

import java.util.concurrent.TimeUnit;

import org.junit.Test;

import com.hascode.tutorial.awaitility.Application;
import com.hascode.tutorial.awaitility.boundary.UserService;
import com.hascode.tutorial.awaitility.control.UserStore;
import com.hascode.tutorial.awaitility.entity.User;

public class CreateUserIT {
	private static final String USERNAME_1 = "xoxo";
	private static final String USERNAME_2 = "fooo";

	Application app = Application.CREATE;
	UserService service = app.getUserService();
	UserStore store = app.getUserStore();

	@Test
	public void shouldCreateUsers() throws Exception {
		service.createUser(USERNAME_1);
		await().atMost(2, TimeUnit.SECONDS);
		User user1 = store.byName(USERNAME_1);
		assertThat(user1.getUserName(), equalTo(USERNAME_1));
		assertThat(user1.getId(), notNullValue());

		service.createUser(USERNAME_2);
		await().pollDelay(2, TimeUnit.SECONDS).until(() -> store.all().size() == 2);
		User user2 = store.byName(USERNAME_2);
		assertThat(user2.getUserName(), equalTo(USERNAME_2));
		assertThat(user2.getId(), notNullValue());
	}
}
This is our test running in Eclipse IDE:

Awaitility enriched JUnit test for the UserService in Eclipse IDE
Atomic Support
When dealing with Java’s atomics, it’s getting just easier as Awaitility allows us to interact with these types directly.
In the first test we’re binding Awaitility toe the state of an AtomicBoolean, in the second we’re waiting for a specific value of an AtomicInteger.
package it;

import static com.jayway.awaitility.Awaitility.await;
import static org.hamcrest.Matchers.equalTo;
import static org.junit.Assert.assertThat;

import java.util.concurrent.atomic.AtomicBoolean;
import java.util.concurrent.atomic.AtomicInteger;

import org.junit.Test;

public class AtomicTests {
	@Test
	public void atomicBooleanExample() throws Exception {
		AtomicBoolean finished = new AtomicBoolean(false);
		AtomicInteger count = new AtomicInteger(0);
		new Thread(() -> {
			try {
				Thread.sleep(3000);
				count.incrementAndGet();
				finished.set(true);
			} catch (Exception e) {
			}
		}).run();
		await().untilTrue(finished);
		assertThat(count.get(), equalTo(1));
	}

	@Test
	public void atomicIntegerExample() throws Exception {
		AtomicBoolean finished = new AtomicBoolean(false);
		AtomicInteger count = new AtomicInteger(0);
		new Thread(() -> {
			try {
				Thread.sleep(3000);
				count.incrementAndGet();
				finished.set(true);
			} catch (Exception e) {
			}
		}).run();
		await().untilAtomic(count, equalTo(1));
		assertThat(finished.get(), equalTo(true));
	}
}
This is our test running in Eclipse IDE:
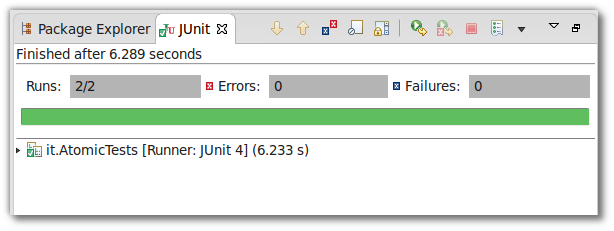
Awaitility enriched JUnit test for the Atomic enhancements running in Eclipse IDE
Using Groovy or Scala
Awaitility offers specialized APIs for Groovy and Scala, please feel free to have a look at the following links for more detailed information:
Appendix : Sample Application using Guava’s Event Bus
This is a small sample application used to demonstrate the usage of Awaitility with this event-based application.
Dependencies
This is our updated build.gradle including the dependencies for Guava:
apply plugin: 'java'
apply plugin: 'eclipse'

sourceCompatibility = 1.8
version = '1.0.0'
jar {
    manifest {
        attributes 'Implementation-Title': 'hasCode.com Awaitility Tutorial', 'Implementation-Version': version
    }
}

repositories {
    mavenCentral()
}

dependencies {
    compile 'com.jayway.awaitility:awaitility:1.6.3'
    compile 'com.google.guava:guava:18.0'
	testCompile 'org.hamcrest:hamcrest-all:1.3'
    testCompile 'junit:junit:4.12'
}
User Entity
This is POJO to encapsulate user information, in addition it contains a factory method to create a new user by his username.
On creation, a UUID is generated for the user.
package com.hascode.tutorial.awaitility.entity;

import java.util.UUID;

public class User {
	private String id;
	private String userName;

	public static User create(String userName) {
		return new User(UUID.randomUUID().toString().toUpperCase(), userName);
	}

	private User(String id, String userName) {
		this.id = id;
		this.userName = userName;
	}

	// getter, setter, hashCode, equals, toString ommitted
}
User Create Event
This POJO encapsulates the event when a new user should be created. In addition to the user data, a time-stamp is created.
package com.hascode.tutorial.awaitility.entity;

import java.time.LocalDateTime;

public class UserCreateEvent {
	private User user;
	private LocalDateTime created;

	// constructor, getter ommitted
}
User Store
The UserStore makes the repository layer to store a concrete user – in our simplified case – in a hashset.
Besides storing users the story allows to return all existing users and to find a user by his username.
package com.hascode.tutorial.awaitility.control;

import java.util.HashSet;
import java.util.Set;

import com.hascode.tutorial.awaitility.entity.User;

public class UserStore {
	private static final Set<User> STORE = new HashSet<>();

	public void persist(User user) {
		System.out.println("persisting new user: " + user);
		STORE.add(user);
	}

	public Set<User> all() {
		return new HashSet<>(STORE);
	}

	public User byName(String userName) {
		return STORE.stream().filter(user -> user.getUserName().equals(userName)).findFirst().get();
	}
}
User Change Handler
This handler is called using the event-bus when a UserCreateEvent has been triggered.
It delegates the user to the user repository aka the user store for persistence.
package com.hascode.tutorial.awaitility.control;

import com.google.common.eventbus.Subscribe;
import com.hascode.tutorial.awaitility.entity.UserCreateEvent;

public class UserChangeHandler {
	private final UserStore userStore;

	public UserChangeHandler(UserStore userStore) {
		this.userStore = userStore;
	}

	@Subscribe
	public void handleUserCreate(UserCreateEvent e) {
		userStore.persist(e.getUser());
	}
}
User Service
This service is our boundary and entry point for creating users in our sample application.
package com.hascode.tutorial.awaitility.boundary;

import com.google.common.eventbus.EventBus;
import com.hascode.tutorial.awaitility.entity.User;
import com.hascode.tutorial.awaitility.entity.UserCreateEvent;

public class UserService {
	private final EventBus eventBus;

	public UserService(EventBus eventBus) {
		this.eventBus = eventBus;
	}

	public void createUser(String userName) {
		eventBus.post(new UserCreateEvent(User.create(userName)));
	}
}
Application
This cheap-shot singleton application simply bootstraps our application by initializing necessary components and setting up the event bus.
package com.hascode.tutorial.awaitility;

import com.google.common.eventbus.EventBus;
import com.hascode.tutorial.awaitility.boundary.UserService;
import com.hascode.tutorial.awaitility.control.UserChangeHandler;
import com.hascode.tutorial.awaitility.control.UserStore;

public enum Application {
	CREATE;

	private final EventBus eventBus = new EventBus();
	private final UserStore userStore = new UserStore();
	private final UserService userService = new UserService(eventBus);

	private Application() {
		eventBus.register(new UserChangeHandler(userStore));
	}

	public UserService getUserService() {
		return userService;
	}

	public UserStore getUserStore() {
		return userStore;
	}
}
Sample Run
Running our application works like this:
package com.hascode.tutorial.awaitility;

import com.hascode.tutorial.awaitility.boundary.UserService;

public class Main {
	public static void main(String[] args) {
		Application app = Application.CREATE;
		UserService userService = app.getUserService();
		userService.createUser("irbaboon");
	}
}
Finally it should produce an output similar to this one:
persisting new user: User [id=54B57F25-285D-4EFB-84C9-4863568E096D, userName=irbaboon]
Tutorial Sources
Please feel free to download the tutorial sources from my Bitbucket repository, fork it there or clone it using Git:
git clone https://bitbucket.org/hascode/awaitility-tutorial.git
Resources
Tags: async, asynchronous, awaitility, event, eventbus, eventhandler, gradle, groovy, guava, junit, scala, subscriber, tdd, test, testing